How Small Businesses Can Benefit from Owning a Bucket Truck


For many small businesses, the idea of owning a bucket truck might seem like an expense that only big companies can justify. But in reality, owning a bucket truck can be a game-changer for smaller operations — saving money, increasing efficiency, and opening doors to new opportunities. Whether you’re in landscaping, signage, or construction, a bucket truck can quickly go from being a luxury to an essential part of your business toolkit.


The Cost of Renting vs. Owning

One of the first questions small business owners ask is whether renting is more cost-effective than buying. Renting a bucket truck often costs anywhere from $300 to $800 per day, depending on the size and features of the truck. That’s fine for an occasional project, but for businesses that use this equipment weekly or even monthly, the rental costs add up quickly.

Owning your own truck means a larger upfront investment, but it also means no more scheduling around availability or paying steep rental fees. In just a couple of years, the truck could pay for itself through the money you save — and the additional revenue you generate by taking on more jobs.


Landscaping and Tree Services

For landscaping companies or tree service businesses, a bucket truck can help you work faster and safer. Instead of relying on ladders or renting lifts, you’ll always have the equipment you need on hand.

  • Tree trimming and removals: A bucket truck makes it easier to reach high branches safely.

  • Storm clean-up: Quick access to a bucket truck means you can respond to emergencies faster, earning more repeat customers.

  • Efficiency gains: Jobs that used to take a day or more can often be completed in a few hours.

Owning your own truck can also make your business more appealing to larger clients, such as municipalities or property management companies, who need quick response times and dependable service.


Signage and Lighting Installers

If your business installs or maintains signs and exterior lighting, owning a bucket truck is almost a no-brainer. It eliminates scheduling delays with rental companies and allows you to offer more flexible services to your clients.

For example, you can handle last-minute requests like replacing a parking lot light or repairing storm-damaged signage without waiting for a rental truck. That level of responsiveness builds trust and keeps your clients coming back.


Small Contractors and General Maintenance Businesses

For small contractors, painters, or general maintenance businesses, having a bucket truck on standby can expand your service offerings overnight. Imagine being able to:

  • Paint or repair multi-story buildings

  • Install or clean exterior windows

  • Assist in roofing or siding jobs without renting lifts

  • Help other businesses with their own maintenance needs

By owning your own equipment, you’re not only saving rental costs but also creating a new revenue stream by subcontracting your truck and operator to other small businesses in your area.


The Hidden Benefits of Ownership

Beyond the obvious financial savings, owning a bucket truck comes with other benefits:

  • Scheduling freedom: No need to coordinate with rental companies or adjust job timelines.

  • Better branding: A custom-wrapped bucket truck doubles as a rolling billboard for your business.

  • Improved reputation: Having your own equipment shows clients you’re established and reliable.

  • Tax advantages: The cost of the truck, maintenance, and fuel can often be written off as business expenses.


Final Thoughts

For small businesses, owning a bucket truck isn’t just about convenience — it’s about creating new opportunities and building a stronger, more competitive company. Whether you’re trimming trees, installing signage, or handling building maintenance, the savings, efficiency, and credibility you gain can far outweigh the initial investment.

If your business rents a bucket truck more than a few times a year, it might be time to do the math and consider making the switch to ownership. The investment could pay for itself faster than you think — and position your business for long-term growth.


Bucket Truck Safety Tips for New Operators


Operating a bucket truck comes with a lot of responsibility. Whether you’re working on electrical lines, trimming trees, or installing signage, safety must always come first. For new operators, the excitement of using a bucket truck can sometimes overshadow the risks. This guide will help you understand the key safety practices you should follow to protect yourself, your team, and your equipment.


Start with Proper Training

The foundation of safe operation begins with proper training. Every new operator should complete a certified training program that covers the equipment’s controls, safety features, and emergency procedures. Simply “learning on the job” isn’t enough when you’re dealing with heavy machinery that operates at heights. A formal training course gives you the confidence and skills needed to make safe decisions while working.


Conduct a Pre-Operation Inspection

Before starting your day, a thorough inspection of the truck and boom should always be your first task. Look for visible damage, leaks, or worn hydraulic hoses. Check that the bucket controls, safety harness points, and emergency stop buttons are in good condition. This habit not only prevents accidents but also extends the life of the truck.


Know Your Surroundings

One of the most common causes of accidents involves failing to account for surroundings. Always scan the area for power lines, tree branches, or other obstacles that could interfere with the boom. If you’re working near traffic, set up proper signage and barriers to alert drivers and pedestrians. Being aware of your environment is just as important as knowing how to operate the truck itself.


Wear the Right Safety Gear

Personal protective equipment (PPE) is your last line of defense if something goes wrong. At a minimum, operators should wear a hard hat, safety glasses, gloves, and a high-visibility vest. And when you’re in the bucket, a properly secured harness is non-negotiable. It’s a simple precaution that can save your life in the event of a slip or unexpected movement.


Communicate with Your Team

Bucket truck operation is rarely a solo task. Clear communication with your ground crew is critical to staying safe and productive. Use hand signals, radios, or a combination of both to keep everyone on the same page. This becomes especially important during complex maneuvers or when you’re working in tight spaces where visibility is limited.


Respect the Load Limits

Every bucket truck is built with specific load limits for both the boom and the platform. Overloading the bucket—even slightly—can put unnecessary strain on the hydraulics and risk a catastrophic failure. Always verify the weight of your tools and materials, and when in doubt, err on the side of caution.


Prepare for Emergencies

No one expects an emergency, but every operator should be ready for one. Familiarize yourself with the truck’s emergency controls, including manual lowering functions in case of power or hydraulic failure. Also, make sure your ground crew knows how to assist in an emergency situation. This preparedness can make the difference between a minor incident and a major accident.


Build Good Habits Early

The best operators are the ones who develop good habits early. Here’s one to remember: “Safety first, every time.” No job is worth cutting corners or ignoring a small issue during your inspection. Taking the extra time to double-check your setup or wait for better weather conditions can prevent serious injuries or damage.


Final Thoughts

A bucket truck is a powerful tool, but it requires respect and attention to detail. By committing to proper training, regular inspections, and safe practices, new operators can build confidence while protecting themselves and their teams. Safety isn’t just about following rules—it’s about creating a culture where everyone goes home at the end of the day.


Top 5 Jobs Perfect for a Utility Bucket Truck


A utility bucket truck is one of the most versatile pieces of equipment for businesses that need to reach high or hard-to-access places. From powering communities to keeping roads safe, these trucks help crews work faster, safer, and more efficiently.

If you’ve been considering investing in a bucket truck or upgrading your fleet, here are the top five industries and jobs where a utility bucket truck can make the biggest impact.

1. Electrical Work

Why bucket trucks are essential: Electricians and lineworkers rely on bucket trucks every day to safely access overhead power lines, transformers, and electrical equipment.

Typical tasks include:

  • Repairing or installing overhead power lines
  • Fixing streetlights or traffic signals
  • Maintaining substations and transformers
  • Emergency storm response and repairs
  • Advantages:
  • Keeps workers safe by reducing the need for ladders or climbing poles
  • Provides a stable, adjustable platform for tools and equipment
  • Speeds up both scheduled maintenance and emergency response times

2. Tree Trimming and Forestry

Why bucket trucks are essential: Tree care professionals often need to reach branches high above ground while keeping their crews safe. Bucket trucks make this process faster and safer.

Typical tasks include:

  • Trimming trees near power lines
  • Removing dangerous or storm-damaged limbs
  • Pruning large trees to improve health and appearance
  • Advantages:
  • Reduces risks compared to climbing or using traditional lifts
  • Increases productivity for large-scale pruning or removal jobs
  • Helps crews reach taller trees without needing additional equipment

3. Signage and Lighting Installation

Why bucket trucks are essential: From small business signage to massive highway billboards, bucket trucks are a must-have for sign companies and lighting specialists.

Typical tasks include:

  • Installing or replacing commercial signage
  • Repairing or maintaining parking lot lights
  • Hanging seasonal decorations or banners
  • Servicing sports field lighting
  • Advantages:
  • Easy positioning for precise work
  • Safer access for tall or awkward installations
  • Reduces setup time compared to scaffolding or lifts

4. Telecommunications

Why bucket trucks are essential: Telecom companies rely heavily on bucket trucks to keep communication lines running smoothly, whether installing new lines or repairing existing systems.

Typical tasks include:

  • Running or repairing fiber optic cables
  • Installing telephone or internet lines
  • Upgrading network infrastructure in neighborhoods or business areas
  • Advantages:
  • Supports high-volume maintenance schedules
  • Provides stable platforms for delicate cable work
  • Reduces downtime for customers by speeding up repairs

5. Construction and Maintenance

Why bucket trucks are essential: In the construction world, height and access can be a major challenge. Bucket trucks give workers the ability to safely reach elevated areas.

  • Typical tasks include:
  • Assisting with exterior building maintenance
  • Installing windows or facade elements
  • Painting or cleaning tall structures
  • Supporting utility installation during new builds
  • Advantages:
  • Versatile for a wide range of tasks on job sites
  • Saves time by eliminating the need for temporary scaffolding
  • Reduces safety risks by providing secure elevated platforms
  • Why Investing in a Bucket Truck Makes Sense
  • No matter your industry, a bucket truck can:
  • Improve safety by reducing climbing risks
  • Increase productivity with faster, more efficient access
  • Save money by eliminating the need for additional equipment rentals
  • Expand your service offerings to take on new jobs

Final Thoughts

From powering communities to keeping streets safe and businesses bright, bucket trucks are vital across multiple industries. Whether you’re an electrical contractor, a tree service company, or part of a construction crew, a bucket truck is more than just a tool — it’s an investment in efficiency, safety, and growth.

If you’re in the market for a bucket truck, consider your industry’s specific needs: boom height, payload capacity, and chassis options can all make a big difference in choosing the right truck for your business.


Ford F-450 Super Duty vs. Competitors: Which Bucket Truck is Right for You?


When your business depends on a bucket truck—whether for construction, electrical, telecom, or tree service—choosing the right platform matters. Among the top contenders, the Ford F-450 Super Duty, Chevy Silverado 4500/5500 HD, and Ram 4500/5500 Chassis Cab stand out for their strength, reliability, and customizability.

But which one is the best fit for your business? Let’s break down the pros and cons of each to help you make a confident choice.


1. Ford F-450 Super Duty

The Ford F-450 Super Duty is often the go-to choice for fleet operators thanks to its balance of power, durability, and technology.

Key Features

  • Engine: 6.7L Power Stroke® V8 Turbo Diesel

  • Towing & Payload: Up to 24,200 lbs. towing and nearly 6,300 lbs. payload capacity (varies by configuration)

  • Transmission: 10-speed automatic

  • Upfit-Friendly Frame: Flat frame rails make it easy to install bucket truck bodies and booms

Pros

  • Excellent towing and payload for heavy-duty applications

  • Wide dealer network and availability of OEM parts

  • Advanced driver-assist technology (e.g., lane-keeping, adaptive cruise)

  • High resale value

Cons

  • Higher initial cost compared to some competitors

  • Slightly stiffer ride when unloaded


2. Chevy Silverado 4500/5500 HD

Chevy’s Silverado HD chassis models have grown in popularity thanks to their user-friendly design and durability.

Key Features

  • Engine: 6.6L Duramax Turbo Diesel V8

  • Towing & Payload: Around 23,500 lbs. towing and up to 7,000 lbs. payload

  • Transmission: Allison® automatic transmission for smoother shifts

  • Tilt Hood Design: Makes maintenance quicker and easier

Pros

  • Easy engine access for maintenance

  • Durable frame built for heavy-duty upfits

  • Competitive price point

  • Smooth and stable ride

Cons

  • Fewer aftermarket accessories compared to Ford and Ram

  • Dealer service network not as widespread in rural areas


3. Ram 4500/5500 Chassis Cab

The Ram Chassis Cab lineup is known for its affordability and customization options, making it popular with budget-conscious buyers.

Key Features

  • Engine Options: 6.7L Cummins Turbo Diesel or 6.4L HEMI® V8

  • Towing & Payload: Up to 24,000 lbs. towing and over 7,000 lbs. payload

  • Transmission: Aisin® automatic transmission for heavy-duty performance

  • Upfit Versatility: Configurations for multiple industries

Pros

  • Competitive pricing compared to Ford and Chevy

  • Comfortable cab interior for long days

  • Strong Cummins engine reliability

  • Wide range of body upfit options

Cons

  • Lower resale value compared to Ford

  • Limited advanced safety tech unless upgraded


Head-to-Head Comparison

Feature/SpecFord F-450Chevy Silverado 4500/5500Ram 4500/5500
Max Towing~24,200 lbs~23,500 lbs~24,000 lbs
Max Payload~6,300 lbs~7,000 lbs~7,000 lbs
Engine Options6.7L Power Stroke V86.6L Duramax V86.7L Cummins / 6.4L HEMI
Ride ComfortGoodSmoothComfortable
Tech & SafetyExcellentBasic but reliableGood, upgrades available
Resale ValueHighModerateModerate-Low
Upfit CompatibilityExcellentExcellentExcellent

Which Truck Should You Choose?

  • Choose the Ford F-450 Super Duty if you need top-tier towing, resale value, and advanced tech for fleet efficiency.

  • Choose the Chevy Silverado 4500/5500 if you want easy maintenance, a stable ride, and competitive pricing.

  • Choose the Ram 4500/5500 if your priority is affordability and customization options without sacrificing heavy-duty capability.


Final Thoughts

No matter which platform you choose, the right bucket truck build can transform your business. The Ford F-450 Super Duty remains a favorite for its durability and broad support network, but Chevy and Ram also offer compelling options depending on your needs and budget.

When comparing options, consider your payload requirements, local dealer support, and long-term maintenance costs. Spending time upfront to evaluate these factors ensures you’ll get a truck that works as hard as you do.


What to Look for When Buying a Used Utility Bucket Truck


Buying a used utility bucket truck can be a smart way to save money while still getting the equipment you need for your business. Whether you’re in tree service, construction, electrical, or telecommunications, the right truck can help you work safer and more efficiently. But before you sign on the dotted line, it’s critical to know what to look for — especially when it comes to the boom, hydraulics, and service body.

In this guide, we’ll break down what to inspect so you can make a confident purchase.


1. Inspect the Boom for Wear and Safety

The boom is the heart of any bucket truck. A poorly maintained boom can lead to costly repairs or even dangerous situations.

What to check:

  • Cracks or visible damage: Look closely for hairline cracks, rust, or weld repairs, especially near pivot points.

  • Smooth movement: Operate the boom to ensure it extends, retracts, and rotates without jerking or hesitation.

  • Insulation integrity: For insulated booms, check that the insulating components are intact and haven’t been compromised.

Pro tip: Ask for the truck’s annual inspection records. OSHA and ANSI require regular testing, and a clean inspection history is a good sign of proper maintenance.


2. Evaluate the Hydraulic System

Hydraulics power everything from the boom to the stabilizers. A failing hydraulic system can quickly turn your “bargain” truck into a money pit.

What to look for:

  • Leaks or seepage: Inspect hoses, cylinders, and fittings for drips or wet spots.

  • Pressure performance: Operate the system to make sure it lifts smoothly and maintains pressure without lagging.

  • Fluid condition: Check the hydraulic fluid level and look for contamination or burnt smells, which may indicate overdue maintenance.

Pro tip: Have a certified mechanic test the system’s pressure to ensure it meets factory specifications.


3. Check the Service Body and Frame

The service body and frame take a beating over time, so don’t overlook this part of your inspection.

Key areas to inspect:

  • Rust and corrosion: Look for rust under the body, around storage compartments, and on the frame rails.

  • Door and latch condition: Make sure compartments open and close smoothly; faulty doors can be a safety hazard.

  • Load rating labels: Verify that the truck’s body matches your work needs, especially if you’ll be hauling heavy tools or equipment.


4. Review Maintenance and Service Records

A well-documented maintenance history can tell you more about the truck than a quick inspection ever could. Look for records of:

  • Regular hydraulic service

  • Boom inspections and certifications

  • Engine and transmission maintenance

  • Any major repairs or part replacements

If the seller can’t produce records, proceed with caution — or budget extra for a comprehensive inspection by a trusted mechanic.


5. Take It for a Test Drive

Finally, always drive the truck. Listen for unusual noises, test the brakes, and make sure the transmission shifts smoothly. A road test can reveal underlying problems that aren’t obvious during a stationary inspection.


Final Thoughts

A used utility bucket truck can be a valuable investment when you know what to look for. By carefully inspecting the boom, hydraulics, and service body, and reviewing maintenance records, you can avoid costly surprises and choose a truck that’s safe, reliable, and ready for work.

If you’re not confident in your own inspection, bring in a qualified mechanic or a bucket truck specialist. A small upfront investment in a professional inspection can save you thousands in unexpected repairs later.


5 Quick Car Maintenance Tips Before Your Summer Vacation


Summer vacation season is upon us, and for many families, that means hitting the road for memorable adventures. Whether you're planning a cross-country road trip, a weekend getaway to the beach, or a camping expedition in the mountains, your car will be your faithful companion throughout the journey. However, nothing can ruin a vacation faster than unexpected car trouble in the middle of nowhere. The good news is that most summer driving issues can be prevented with some simple maintenance checks before you leave home.

Taking just a few hours to inspect and service your vehicle before departure can save you from costly repairs, dangerous breakdowns, and ruined vacation plans. Summer driving presents unique challenges for your car, including extreme heat, heavy loads, and extended periods of operation. By following these five essential maintenance tips, you'll ensure your vehicle is ready to handle whatever summer throws at it, giving you peace of mind and keeping your focus where it belongs – on making memories with your loved ones.

1. Check and Service Your Cooling System

Your car's cooling system works overtime during summer months, making it the most critical system to inspect before any warm-weather travel. High temperatures, combined with the stress of highway driving and air conditioning use, can push your cooling system to its limits. A failing cooling system can lead to engine overheating, which may cause catastrophic engine damage and leave you stranded.

Start by checking your coolant level when the engine is completely cool. The coolant reservoir should have clear minimum and maximum level markings. If the level is low, add a 50/50 mixture of antifreeze and distilled water. Never add coolant to a hot engine, as this can cause thermal shock and crack the engine block. While you're checking the coolant level, inspect the color and consistency of the fluid. Fresh coolant should be bright green, orange, or pink (depending on your car's specifications) and relatively clear. If the coolant appears brown, rusty, or contains floating debris, it's time for a complete coolant system flush.

Don't forget to inspect all the hoses and connections in your cooling system. Look for signs of cracking, bulging, or soft spots in the radiator hoses, heater hoses, and bypass hoses. These rubber components deteriorate over time and are more likely to fail under the stress of summer heat. Check that all hose clamps are tight and show no signs of rust or corrosion. A loose clamp can cause coolant leaks that lead to overheating.

The radiator itself deserves special attention. Remove any debris, leaves, or bugs from the radiator fins, as these can block airflow and reduce cooling efficiency. A gentle spray with a garden hose from the back of the radiator can help clear stubborn debris. Finally, test your radiator cap. A faulty cap can cause coolant loss and reduce system pressure, leading to overheating even when coolant levels appear adequate.

2. Inspect and Maintain Your Tires

Your tires are the only point of contact between your vehicle and the road, making them crucial for safe summer travel. Hot pavement and long distances can be particularly demanding on tires, increasing the risk of blowouts and premature wear. A comprehensive tire inspection should be at the top of your pre-vacation checklist.

Begin by checking tire pressure in all four tires, including your spare. Use a reliable tire pressure gauge when tires are cold, preferably first thing in the morning before driving. Summer heat causes air to expand, so tire pressure will naturally increase as you drive. Proper inflation is essential for optimal fuel economy, handling, and tire longevity. Under-inflated tires generate excessive heat and are more prone to blowouts, while over-inflated tires provide a harsh ride and uneven wear patterns.

Examine the tread depth on each tire using the penny test. Insert a penny into the tread groove with Lincoln's head pointing down. If you can see the top of Lincoln's head, your tires have less than 2/32 inch of tread remaining and should be replaced before your trip. Adequate tread depth is essential for traction, especially in wet conditions that can occur during summer thunderstorms.

Look for signs of uneven wear, which can indicate alignment issues, suspension problems, or improper inflation. Check the sidewalls for cuts, bulges, or cracks that could lead to tire failure. Any tire showing signs of damage should be replaced before travel. Don't forget to inspect your spare tire as well, ensuring it's properly inflated and in good condition. Consider upgrading to a full-size spare if you're planning extended travel in remote areas.

3. Test Your Air Conditioning System

A functioning air conditioning system isn't just about comfort during summer travel – it's also a safety issue. Extreme heat can cause driver fatigue, dehydration, and reduced concentration, all of which increase the risk of accidents. Testing your A/C system before departure ensures you'll stay cool and alert throughout your journey.

Start your car and turn the air conditioning to maximum cooling with the fan on high. The system should begin producing noticeably cool air within a few minutes. If the air isn't cooling properly, you may need to have the refrigerant level checked or recharged by a professional. Low refrigerant is the most common cause of poor A/C performance and can usually be resolved quickly and inexpensively.

Check that air flows properly from all vents in your vehicle. Blocked or restricted airflow can indicate problems with the cabin air filter, which should be replaced regularly. A clogged cabin filter not only reduces A/C efficiency but also affects air quality inside your vehicle. While you're at it, clean any debris from the exterior A/C condenser, which is typically located in front of the radiator.

Listen for unusual noises when the A/C is running. Squealing, grinding, or rattling sounds can indicate worn belts, failing compressor bearings, or loose components. These issues should be addressed by a professional before they lead to complete system failure. Remember that A/C systems work harder in stop-and-go traffic, so ensure your system can handle extended periods of operation.

4. Check All Fluid Levels and Quality

Your car relies on various fluids to operate safely and efficiently. Summer's heat accelerates fluid breakdown and increases consumption, making it essential to check all fluid levels and quality before hitting the road. This comprehensive fluid check can prevent numerous mechanical problems and ensure optimal performance during your vacation.

Engine oil is the lifeblood of your vehicle, and summer heat can break down oil more quickly than normal. Check the oil level using the dipstick, ensuring the level falls between the minimum and maximum marks. More importantly, assess the oil's condition. Fresh oil should be relatively clear and flow easily. If the oil appears thick, black, or gritty, it needs to be changed before your trip. Consider using a high-quality synthetic oil for summer travel, as it provides better protection under extreme temperatures.

Brake fluid is critical for safe stopping power, especially important when navigating mountain roads or heavy traffic. Check the brake fluid level in the master cylinder reservoir, and examine the fluid's color and clarity. Brake fluid should be clear or slightly amber. If it appears dark or contaminated, have it replaced by a professional. Remember that brake fluid absorbs moisture over time, which can lead to brake failure in extreme conditions.

Power steering fluid, transmission fluid, and windshield washer fluid also deserve attention. Low power steering fluid can make steering difficult, particularly when parking or maneuvering in tight spaces. Transmission fluid should be checked with the engine running and the transmission warm. Clean, red transmission fluid indicates good condition, while dark or burnt-smelling fluid suggests the need for service. Finally, ensure your windshield washer reservoir is full – summer travel often means dusty conditions and increased need for windshield cleaning.

5. Inspect Belts, Hoses, and Battery

The engine compartment contains numerous rubber components and electrical systems that are particularly vulnerable to summer heat. A thorough inspection of belts, hoses, and your battery can prevent roadside breakdowns and ensure reliable operation throughout your vacation.

Examine all drive belts for signs of wear, including cracking, fraying, or glazing. A broken serpentine belt can disable your alternator, power steering, and air conditioning simultaneously, leaving you stranded. Check belt tension by pressing down on the belt midway between pulleys – it should deflect about half an inch with moderate pressure. Loose belts can slip and cause poor performance, while overtightened belts can damage bearings and pulleys.

All rubber hoses in the engine compartment should be inspected for cracks, bulges, or soft spots. Pay particular attention to radiator hoses, brake lines, and vacuum hoses. Squeeze accessible hoses to check for firmness – they should feel solid and maintain their shape. Any hose that feels spongy or shows visible damage should be replaced before travel.

Your battery works harder in summer heat, and the stress of extended driving can reveal underlying problems. Clean any corrosion from battery terminals using a wire brush and baking soda solution. Check that battery connections are tight and secure. If your battery is more than three years old, consider having it tested by a professional. A weak battery may start your car fine in familiar surroundings but fail when you need it most during travel.

Conclusion

Preparing your car for summer vacation doesn't require advanced mechanical knowledge or expensive tools – just a systematic approach and attention to detail. These five maintenance checks can be completed in a few hours and will significantly reduce your risk of vacation-ruining breakdowns. Remember that preventing problems is always easier and less expensive than dealing with roadside emergencies.

While these tips cover the most common summer driving issues, don't hesitate to consult a professional mechanic if you discover any problems during your inspection. A pre-vacation tune-up might seem like an unnecessary expense, but it's minimal compared to the cost of emergency repairs or a ruined vacation.

With proper preparation, your summer road trip can be filled with adventure, relaxation, and cherished memories – not mechanical frustrations. Take the time to show your car some attention before departure, and it will faithfully carry you to your destination and back home again. Safe travels, and enjoy your summer adventures!


How to Check Your Tires for Safe Summer Driving


As temperatures rise and summer road trip season approaches, ensuring your tires are in optimal condition becomes more critical than ever. Summer driving presents unique challenges that can put extra stress on your tires, from scorching hot pavement to sudden thunderstorms. A comprehensive tire inspection routine can mean the difference between a safe, enjoyable journey and a dangerous roadside emergency.

Why Summer Tire Maintenance Matters

Summer conditions create a perfect storm of factors that can compromise tire safety. High temperatures cause tire pressure to fluctuate, hot asphalt increases tire wear, and summer storms demand maximum traction from your tread. Additionally, summer is prime time for long-distance travel, placing extended demands on tires that may have been neglected during milder months.

The consequences of tire failure during summer driving can be severe. Blowouts at highway speeds become more dangerous when roads are crowded with vacation traffic. Heat-related tire failures often occur without warning, leaving drivers stranded in potentially dangerous locations. By implementing a thorough tire inspection routine, you can identify potential problems before they become roadside emergencies.

Essential Tools for Tire Inspection

Before beginning your tire inspection, gather the necessary tools to ensure accuracy and thoroughness. A reliable tire pressure gauge is essential, as built-in gauges at gas stations are often inaccurate. Digital gauges tend to be more precise than analog versions, though both can be effective when properly calibrated.

A tread depth gauge provides the most accurate measurement of remaining tread, though the penny test works as a quick field check. Keep a flashlight or phone light handy for inspecting darker areas of the tire and sidewall. A tire pressure monitoring system, if your vehicle has one, can alert you to pressure changes, but manual checks remain important for comprehensive assessment.

Checking Tire Pressure: The Foundation of Safety

Proper tire pressure is arguably the most critical aspect of tire safety, yet it's often the most neglected. Summer heat causes air inside tires to expand, potentially leading to overinflation, while air conditioning and temperature variations can cause pressure to drop unexpectedly.

Check tire pressure when tires are cold, ideally before driving or after the vehicle has been parked for at least three hours. Hot tires from recent driving will give falsely high readings. Remove the valve cap and press the tire gauge firmly onto the valve stem until the hissing stops. Compare the reading to the recommended PSI found in your owner's manual or on the driver's side door jamb sticker.

Don't rely on the maximum pressure listed on the tire sidewall, as this represents the tire's maximum capacity, not the optimal pressure for your specific vehicle. Underinflated tires generate excessive heat through increased friction, leading to premature wear and potential blowouts. Overinflated tires reduce the contact patch with the road, compromising traction and causing uneven wear patterns.

Assessing Tread Depth for Summer Conditions

Adequate tread depth becomes especially important during summer months when sudden thunderstorms can turn dry roads into slippery hazards. The legal minimum tread depth of 2/32 of an inch is insufficient for optimal performance in wet conditions, where 4/32 of an inch is recommended for adequate water evacuation.

The penny test provides a quick assessment method: insert a penny into the tread groove with Lincoln's head pointing down. If you can see the top of Lincoln's head, your tread depth is at or below 2/32 of an inch and requires immediate replacement. For a more precise measurement, use a tread depth gauge, checking multiple locations across the tire's width and around the circumference.

Pay attention to uneven wear patterns, which can indicate underlying issues with alignment, suspension, or tire pressure. Cupping or scalloping patterns suggest suspension problems, while wear concentrated on the outer edges indicates chronic underinflation. Center wear patterns typically result from overinflation, while one-sided wear suggests alignment issues.

Conducting a Comprehensive Visual Inspection

A thorough visual inspection can reveal problems that pressure and tread depth measurements might miss. Walk around your vehicle and examine each tire systematically, looking for cuts, punctures, bulges, or embedded objects. Small nails or screws might not cause immediate air loss but can worsen over time, especially under summer heat stress.

Inspect the sidewalls carefully for cracks, cuts, or bulges, which can indicate internal damage or age-related deterioration. Sidewall damage is particularly dangerous because it can lead to sudden tire failure without warning. Look for any signs of separation between the tread and sidewall, which may appear as bubbling or irregular surface texture.

Check for unusual objects embedded in the tread, such as stones, glass, or metal fragments. While small stones often work themselves out naturally, larger objects should be removed carefully to prevent further damage. If you find a puncture, avoid removing the object until you can get to a tire professional, as it may be acting as a temporary plug.

Understanding Tire Age and Heat Degradation

Even tires with adequate tread depth can become unsafe due to age-related deterioration, a process accelerated by summer heat. Rubber compounds break down over time, losing flexibility and strength regardless of mileage. This degradation process occurs even when tires are properly stored, making age assessment crucial for summer safety.

Locate the DOT code on the tire sidewall, which contains the manufacturing date in a four-digit format. The last four digits represent the week and year of manufacture. For example, "3219" indicates the tire was manufactured in the 32nd week of 2019. Most tire manufacturers recommend replacement after six years, with an absolute maximum of ten years regardless of appearance or tread depth.

Summer heat accelerates rubber degradation, making age limits more critical in hot climates. Tires exposed to consistent high temperatures, UV radiation, and ozone may deteriorate faster than those in moderate climates. If your tires are approaching the six-year mark, consider replacement before embarking on long summer trips.

Seasonal Maintenance: Rotation and Alignment

Regular tire rotation becomes more important during summer months when increased driving puts extra stress on tires. Rotate tires every 5,000 to 7,500 miles, or according to your vehicle manufacturer's recommendations. Proper rotation ensures even wear distribution, maximizing tire lifespan and maintaining consistent traction across all four tires.

Summer driving often involves highway speeds and varied road conditions that can reveal alignment issues. If your vehicle pulls to one side, the steering wheel isn't centered when driving straight, or you notice uneven tire wear, have your alignment checked by a qualified technician. Misalignment causes premature tire wear and can compromise handling, especially dangerous during emergency maneuvers.

Preparing for Summer Road Trips

Before embarking on long summer journeys, perform a comprehensive tire inspection including all the checks mentioned above. Consider having your tires professionally inspected if you notice any concerning signs or if your tires are approaching replacement time. The cost of professional inspection is minimal compared to the potential consequences of tire failure during travel.

Pack a portable tire inflator and tire repair kit for minor issues that might occur during travel. Know the location of your spare tire and ensure it's properly inflated and in good condition. If your vehicle uses a temporary spare, understand its speed and distance limitations.

Creating a Maintenance Schedule

Develop a regular tire maintenance schedule that includes monthly pressure checks, quarterly visual inspections, and annual professional evaluations. Summer conditions may require more frequent attention, especially if you're planning extended travel or driving in extreme conditions.

Keep records of tire maintenance, including pressure readings, rotation dates, and any issues discovered during inspections. This information helps identify patterns and can be valuable when consulting with tire professionals about replacement timing or performance concerns.

Conclusion

Proper tire maintenance is an investment in your safety and peace of mind during summer driving. By implementing a comprehensive inspection routine that includes pressure monitoring, tread depth assessment, visual examination, and age evaluation, you can identify potential problems before they become dangerous situations. Remember that tire safety isn't just about avoiding inconvenience; it's about protecting yourself, your passengers, and other drivers on the road.

The few minutes spent on regular tire inspection can prevent hours of roadside delays, costly emergency repairs, and potentially serious accidents. Make tire safety a priority this summer, and enjoy the peace of mind that comes with knowing your tires are ready for whatever the road brings.


Used SUVs Perfect for Family Vacations This Summer


As summer approaches and families across the country begin planning their annual getaways, the quest for the perfect family vehicle becomes paramount. While new SUVs offer the latest features and warranties, used SUVs present an attractive alternative that combines reliability, space, and value. For families looking to maximize their vacation budget while ensuring comfort and safety on the road, a well-chosen used SUV can be the ideal solution.

Why Choose a Used SUV for Family Travel?

The decision to purchase a used SUV for family vacations offers numerous advantages that extend beyond simple cost savings. First and foremost, the value proposition is compelling. New vehicles depreciate rapidly, losing approximately 20% of their value in the first year alone. By choosing a used SUV that's two to three years old, families can access premium features and reliability at a fraction of the original cost.

Used SUVs also provide the spaciousness that growing families need. With multiple rows of seating, ample cargo space, and higher seating positions that offer better visibility, these vehicles are designed with family comfort in mind. The elevated driving position not only provides a commanding view of the road but also makes it easier to spot potential hazards, enhancing safety for precious cargo.

Furthermore, many used SUVs come with proven track records. Unlike new models that may have untested features or potential recall issues, established SUV models have undergone real-world testing by thousands of owners. This means families can research reliability ratings, common maintenance issues, and owner satisfaction scores before making their purchase.

Top Used SUV Models for Family Adventures

Honda Pilot (2016-2019)

The Honda Pilot stands out as one of the most reliable and family-friendly SUVs in the used market. With three rows of seating that can accommodate up to eight passengers, the Pilot offers exceptional versatility for families of all sizes. The second-generation Pilot, available from 2016 onwards, features a more refined interior, improved fuel economy, and Honda's reputation for longevity.

Key features that make the Pilot ideal for family vacations include generous cargo space behind the third row, comfortable seating throughout all three rows, and Honda Sensing safety suite standard on most models. The Pilot's V6 engine provides adequate power for highway cruising and mountain driving, while still delivering respectable fuel economy for its size.

Toyota Highlander (2014-2019)

Toyota's Highlander represents the perfect balance of reliability, comfort, and efficiency for family travel. Known for Toyota's legendary build quality, used Highlanders offer peace of mind for long-distance journeys. The Highlander's interior is thoughtfully designed with family needs in mind, featuring easy-to-clean surfaces, multiple cup holders, and convenient storage compartments throughout the cabin.

The Highlander's smooth ride quality makes it particularly suitable for long road trips, while its fuel economy outperforms many competitors in the three-row SUV segment. Available in both front-wheel and all-wheel drive configurations, the Highlander can handle various weather conditions and terrain types that families might encounter during their adventures.

Ford Explorer (2016-2019)

The Ford Explorer offers a compelling combination of power, space, and technology that appeals to families seeking adventure. With its muscular styling and robust construction, the Explorer is well-suited for families who plan to venture off the beaten path. The Explorer's towing capacity makes it an excellent choice for families who want to bring along boats, trailers, or recreational vehicles.

Inside, the Explorer provides comfortable seating for up to seven passengers, with optional captain's chairs in the second row that enhance comfort for longer journeys. The available SYNC 3 infotainment system keeps families connected and entertained, while features like remote start and power liftgate add convenience to daily use.

Chevrolet Traverse (2013-2017)

The Chevrolet Traverse offers one of the most spacious interiors in the three-row SUV segment, making it an excellent choice for large families or those who prioritize passenger comfort. With genuine seating for eight adults, the Traverse doesn't compromise on space in any row. The vehicle's wide-opening doors and low step-in height make it easy for children and elderly family members to enter and exit.

The Traverse's cargo capacity is particularly impressive, offering more space than many competitors even with all seats in use. This makes it ideal for families who need to pack extensively for their vacation adventures. The available all-wheel drive system provides additional traction for families traveling to destinations with challenging weather conditions.

Key Features to Look for in Used Family SUVs

When shopping for a used SUV for family vacations, certain features should be prioritized to ensure the best possible experience. Safety features top the list, with modern SUVs offering advanced systems like blind-spot monitoring, lane departure warning, and automatic emergency braking. These technologies are particularly valuable during long drives when fatigue can impact reaction times.

Entertainment and connectivity features are crucial for keeping families happy during extended road trips. Look for SUVs with rear-seat entertainment systems, multiple USB ports, and Wi-Fi hotspot capability. These features can transform a potentially stressful journey into an enjoyable experience for passengers of all ages.

Climate control is another essential consideration. Three-zone or four-zone climate control allows different areas of the vehicle to maintain optimal temperatures, ensuring that everyone remains comfortable regardless of external conditions or personal preferences.

Storage solutions throughout the cabin are invaluable for family travel. Look for SUVs with multiple cup holders, door pockets, center console storage, and under-seat compartments. These features help keep the interior organized and reduce the chaos that can accompany family travel.

Maintenance and Reliability Considerations

When purchasing a used SUV, maintenance history and reliability records should be thoroughly investigated. Request maintenance records from the previous owner and have the vehicle inspected by a qualified mechanic before purchase. Pay particular attention to major systems like the engine, transmission, brakes, and suspension, as these components are crucial for safe family travel.

Research the specific model's common issues and recalls. Some SUVs may have known problems with certain model years that can be avoided by choosing different years or addressing issues proactively. Online forums and reliability databases provide valuable insights from actual owners about long-term ownership experiences.

Consider the availability and cost of parts and service for your chosen SUV. Popular models like the Honda Pilot and Toyota Highlander typically have widespread service networks and readily available parts, which can be crucial when traveling far from home.

Financial Benefits of Choosing Used

The financial advantages of choosing a used SUV extend beyond the initial purchase price. Insurance costs for used vehicles are typically lower than for new ones, as the replacement value is reduced. Additionally, many used SUVs have already experienced their steepest depreciation, meaning they'll retain their value better than new vehicles.

Financing options for used SUVs have improved significantly in recent years, with many lenders offering competitive rates for certified pre-owned vehicles. Some manufacturers also extend warranty coverage to used vehicles, providing additional peace of mind for family travel.

The money saved by choosing a used SUV can be redirected toward the family vacation itself, allowing for better accommodations, more activities, or extended travel time. This approach maximizes the overall value of the family's investment in both transportation and experiences.

Conclusion

Choosing the right used SUV for family vacations requires careful consideration of space, reliability, safety, and value. Models like the Honda Pilot, Toyota Highlander, Ford Explorer, and Chevrolet Traverse offer proven track records of family-friendly performance at attractive price points. By focusing on vehicles with strong maintenance histories, comprehensive safety features, and family-oriented amenities, parents can find the perfect used SUV to create lasting vacation memories.

The key to success lies in thorough research, careful inspection, and realistic assessment of family needs. With the right used SUV, families can embark on their summer adventures with confidence, knowing they have a reliable, comfortable, and spacious vehicle that won't break the budget. The open road awaits, and the perfect used SUV is ready to take your family there in style and comfort.


How to Prepare Your Car for Summer Heat: A Complete Guide


Summer driving presents unique challenges that can test your vehicle's limits and potentially leave you stranded if you're not properly prepared. As temperatures soar, your car's various systems work overtime to maintain optimal performance, making thorough preparation essential for safe and reliable summer driving. This comprehensive guide will walk you through every critical aspect of preparing your vehicle for the intense heat and demanding conditions of summer.

Understanding Summer's Impact on Your Vehicle

Before diving into specific preparations, it's important to understand how extreme heat affects your car. High temperatures cause fluids to expand, rubber components to deteriorate faster, and electrical systems to work harder. The combination of scorching pavement, intense UV radiation, and prolonged exposure to heat creates a perfect storm that can overwhelm unprepared vehicles.

Your car's cooling system, in particular, faces its greatest challenge during summer months. The engine generates tremendous heat during normal operation, and when ambient temperatures climb above 90°F, the cooling system must work exponentially harder to prevent overheating. Similarly, your air conditioning system, which might have operated flawlessly during cooler months, suddenly bears the full burden of keeping you comfortable in triple-digit heat.

Air Conditioning System: Your Comfort Lifeline


Comprehensive AC Inspection

Your air conditioning system deserves the most thorough attention when preparing for summer. Start by running your AC system for at least 15 minutes to assess its current performance. The air coming from your vents should be consistently cold, typically 15-20 degrees cooler than the ambient temperature when the system is functioning optimally.

Listen carefully for unusual noises when the AC is running. Grinding, squealing, or clicking sounds often indicate failing components that could leave you without cooling when you need it most. The compressor, which is the heart of your AC system, should engage smoothly without excessive noise or vibration.

Check all AC vents throughout your vehicle to ensure they're producing cold air evenly. Weak airflow from certain vents might indicate blocked ducts, failing blend doors, or problems with the blower motor. Clean all vents thoroughly, removing any accumulated dust or debris that could restrict airflow.

Refrigerant Levels and Leak Detection

Low refrigerant is one of the most common causes of AC failure during summer heat. Unlike other automotive fluids, refrigerant operates in a closed system and shouldn't need regular topping off. If your AC isn't cooling effectively, you likely have a leak that needs professional attention.

Signs of refrigerant leaks include oily residue around AC components, particularly near the compressor, condenser, or evaporator. You might also notice a sweet, chemical smell when running the AC. Professional leak detection using specialized equipment can identify even small leaks that aren't immediately visible.

Condenser and Evaporator Maintenance

The condenser, located at the front of your vehicle behind the grille, plays a crucial role in heat dissipation. Inspect it carefully for damage, including bent fins, punctures from road debris, or accumulation of dirt and insects. A damaged or clogged condenser significantly reduces cooling efficiency.

Clean the condenser thoroughly using a soft brush and gentle water spray. Work from the inside out to avoid pushing debris deeper into the fins. Bent fins can often be straightened carefully with a fin comb, but severely damaged condensers may require replacement.

The evaporator, while less accessible, also requires attention. Signs of evaporator problems include musty odors when running the AC, water puddles inside the vehicle, or inconsistent cooling. Professional cleaning and inspection are typically necessary for evaporator maintenance.

Cabin Air Filter Replacement

Your cabin air filter directly affects AC performance and air quality. A clogged filter restricts airflow, forcing the AC system to work harder and reducing cooling efficiency. During summer preparation, inspect the cabin air filter and replace it if it appears dirty or clogged.

Most cabin air filters are located behind the glove compartment or under the dashboard, making them accessible for DIY replacement. Choose a high-quality filter that matches your vehicle's specifications, and consider upgrading to a premium filter with enhanced filtration capabilities if you frequently drive in dusty conditions.

Cooling System: Preventing Overheating Disasters

Coolant System Inspection

Your engine's cooling system is absolutely critical for summer driving. Begin by checking coolant levels when the engine is completely cool. The coolant reservoir should show levels between the minimum and maximum marks, and the coolant should appear clean and free of debris.

Inspect the coolant's condition carefully. Fresh coolant typically appears bright green, orange, or pink depending on the type used in your vehicle. If the coolant appears rusty, cloudy, or contains floating particles, it needs replacement regardless of the maintenance schedule.

Radiator Maintenance

The radiator serves as the primary heat exchanger in your cooling system. Inspect it thoroughly for signs of damage, including bent fins, corrosion, or evidence of leaks. The radiator cap also deserves attention, as a failing cap can cause cooling system pressure loss and overheating.

External cleaning is crucial for optimal radiator performance. Use a garden hose to flush debris from the radiator fins, working from the engine side toward the front of the vehicle. This prevents pushing debris deeper into the radiator core. For stubborn buildup, use a soft brush to gently remove accumulated dirt and insects.

Internal radiator cleaning may be necessary if the cooling system hasn't been maintained properly. Professional radiator flushing removes scale, rust, and other deposits that can restrict coolant flow and reduce heat transfer efficiency.

Thermostat and Water Pump Evaluation

The thermostat regulates coolant flow through the cooling system and can fail in ways that cause overheating. A thermostat stuck in the closed position prevents coolant circulation, while one stuck open causes the engine to run too cool and reduces efficiency.

Signs of thermostat problems include erratic temperature gauge readings, overheating in stop-and-go traffic, or engines that take unusually long to warm up. If your vehicle has exhibited any of these symptoms, have the thermostat tested before summer driving begins.

The water pump circulates coolant throughout the cooling system and is essential for preventing overheating. Listen for unusual noises from the water pump area, and check for coolant leaks around the pump housing. A failing water pump bearing often produces a grinding or squealing noise that becomes more pronounced as engine RPM increases.

Hose and Belt Inspection

Cooling system hoses carry coolant under pressure and elevated temperatures, making them vulnerable to failure during summer heat. Inspect all cooling system hoses for signs of deterioration, including cracks, bulges, or soft spots that indicate internal breakdown.

Pay particular attention to hose connections and clamps. Loose clamps can cause coolant leaks, while over-tightened clamps can damage hose material. Replace any questionable hoses before they fail, as a cooling system hose failure can cause immediate overheating and potentially catastrophic engine damage.

Drive belts, particularly the serpentine belt that drives the water pump and other accessories, also require careful inspection. Look for cracking, fraying, or glazing on the belt surface. A failing belt can cause water pump failure and immediate overheating.

Tire Pressure and Tire Care

Understanding Heat's Effect on Tire Pressure

Tire pressure increases predictably with temperature, following the general rule that pressure increases by approximately 1 PSI for every 10°F temperature rise. This means tires properly inflated at 70°F will be over-inflated when parked in 100°F+ summer heat, potentially leading to reduced traction, uneven wear, and increased blowout risk.

Proper Pressure Monitoring

Check tire pressure frequently during summer months, ideally when tires are cool (before driving or after the vehicle has been parked for several hours). Use a high-quality tire pressure gauge for accurate readings, as gas station gauges are notoriously unreliable.

Adjust tire pressure according to manufacturer recommendations, which are typically found on a sticker inside the driver's door jamb or in the owner's manual. Don't use the maximum pressure listed on the tire sidewall, as this represents the tire's maximum safe pressure, not the optimal pressure for your vehicle.

Tire Condition Assessment

Summer heat accelerates tire aging and can cause rapid deterioration of compromised tires. Inspect all tires carefully for signs of damage, including cuts, punctures, bulges, or embedded objects. Pay particular attention to the tire sidewalls, where heat-related damage often appears first.

Check tread depth using the penny test or a tread depth gauge. Tires with insufficient tread depth are more prone to blowouts and provide reduced traction on hot pavement. Replace tires that show 2/32" or less tread depth, and consider replacement at 4/32" if you frequently drive in wet conditions.

Wheel Alignment and Balancing

Proper wheel alignment becomes even more critical during summer driving. Misaligned wheels cause uneven tire wear, reduced fuel efficiency, and handling problems that can be dangerous in emergency situations. Hot pavement can exacerbate alignment issues, making problems more noticeable during summer driving.

If your vehicle pulls to one side, the steering wheel isn't centered when driving straight, or you notice uneven tire wear patterns, have the alignment checked and corrected before summer driving begins. Similarly, wheel balancing issues that cause vibration can worsen in summer heat and lead to premature tire failure.

Battery and Electrical System Preparation

Battery Performance in Heat

While cold weather gets more attention for battery problems, extreme heat is actually harder on automotive batteries. High temperatures accelerate chemical reactions inside the battery, leading to faster electrolyte evaporation and internal plate corrosion. A battery that performs adequately in moderate temperatures may fail when subjected to prolonged summer heat.

Battery Testing and Maintenance

Have your battery professionally tested before summer begins, especially if it's more than three years old. Battery load testing provides a more accurate assessment of battery condition than simple voltage measurements. Many automotive stores offer free battery testing services.

Clean battery terminals and cable connections thoroughly, removing any corrosion that could impede electrical flow. Apply a thin layer of petroleum jelly or battery terminal protectant to prevent future corrosion. Ensure battery hold-down hardware is secure, as excessive vibration can damage internal battery components.

Electrical System Inspection

Summer heat can affect various electrical components throughout your vehicle. Check all exterior lights, including headlights, taillights, turn signals, and hazard lights. Replace any burned-out bulbs and clean lens covers to ensure maximum visibility.

Inspect wiring for signs of heat damage, particularly in the engine compartment where temperatures are highest. Look for cracked insulation, brittle wires, or connections that appear corroded or loose. Address any electrical issues before they cause breakdowns during summer travel.

Engine Oil and Fluid Management

Oil Viscosity Considerations

Engine oil serves as both a lubricant and coolant for internal engine components. Summer heat can cause oil to break down more quickly, reducing its protective properties. Consider switching to a higher viscosity oil or full synthetic oil that maintains its properties better under extreme heat.

Check oil levels regularly during summer months and change oil according to severe service intervals if you frequently drive in stop-and-go traffic or extreme temperatures. Dark, thick oil should be changed immediately, regardless of mileage since the last change.

Transmission Fluid

Automatic transmissions generate significant heat during operation, and summer driving can push transmission temperatures to dangerous levels. Check transmission fluid level and condition, looking for signs of overheating such as a burnt smell or dark color.

Consider having transmission fluid changed before summer if it's been more than two years since the last service. Installing an auxiliary transmission cooler can provide additional protection for vehicles used for towing or frequent stop-and-go driving.

Power Steering and Brake Fluid

Power steering fluid can overheat and lose its properties under extreme conditions. Check fluid level and condition, and top off or replace as needed. Similarly, brake fluid absorbs moisture over time and can contribute to brake fade under extreme heat. Have brake fluid tested and replaced if it shows signs of contamination.

Additional Summer Preparations

Emergency Kit Assembly

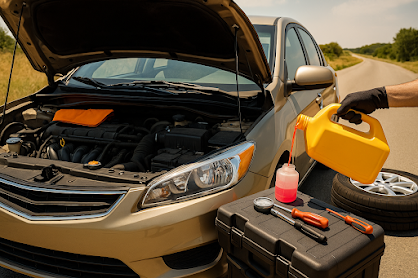
Prepare a comprehensive emergency kit tailored for summer driving conditions. Include extra water for both drinking and engine cooling, tools for basic repairs, and supplies for staying comfortable if you become stranded in heat. A properly stocked emergency kit can mean the difference between a minor inconvenience and a dangerous situation.

Interior Protection

Protect your vehicle's interior from UV damage and extreme heat. Use sunshades or window tinting to reduce interior temperatures and prevent dashboard cracking and seat fading. Consider seat covers and steering wheel covers to make your vehicle more comfortable during hot weather.

Professional Inspection

Even with thorough DIY preparation, consider having your vehicle professionally inspected before summer driving season. A qualified technician can identify potential problems that might not be obvious to the average driver and ensure all systems are ready for the demands of summer driving.

Conclusion

Preparing your vehicle for summer heat requires attention to multiple systems and components, each playing a crucial role in reliable operation under extreme conditions. The investment in proper preparation pays dividends in reduced breakdown risk, improved comfort, and peace of mind during summer travel. Don't wait until the first heat wave to address these preparations – start early and ensure your vehicle is ready to handle whatever summer throws at it.

Regular maintenance and proactive preparation are your best defenses against summer heat-related vehicle problems. By following this comprehensive guide and staying attentive to your vehicle's needs throughout the summer months, you'll be able to enjoy safe, comfortable driving regardless of how high the mercury climbs.